Perlin Noise

It is amazing. This is truly something that has made me appreciate maths even further. I have heard the term Perlin Noise used a few times in class and recently while watching a tutorial, the term came up again and I started to research.

My plan was to read about it a bit to get a grasp of it then move on, but four hours later and I have this:

PerlinNoise

I was so astounded by how amazing Perlin Noise is that I had to play with it. In the project I was getting the Perlin Noise value based off each block’s X and Z coords. I also used an X and Z offset to make the world different each time. Then I was using the value to determine how high the blocks should be (lighter colours are higher and darker are lower). Finally, I mapped colour to the blocks based off percentage and height. I made it so you can add as many colours as you want and it will paint the colours using percentage. In the image above, I have 5 colours and it is mapping each one to a 20% range.

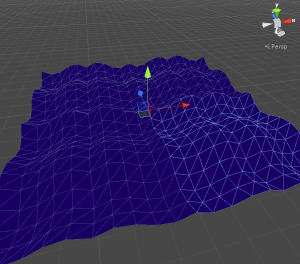
After making this, I began to think what else I could use Perlin Noise for. I had an idea of using it to make terrain out of Planes. So I created 4 Planes, then moved their verticies to match the Perline Noise and got hills.

PerlinNoisePlain

Also while doing this, I had one more idea. I noticed while increasing the X and Z offset, it looked like waves. So I want to use Perlin Noise for waves in the near future.

In conclusion, I had a lot of fun with Perlin Noise and came up with some good uses for it which I can utilise in the future.

Learing to Model

Today was the first step towards finally learning how to model. I had a 3.5hour gap between classes and decided to utilise it to make a model for my game. I recently created a terrain system using perlin noise and I wanted some wildlife to put in there. So I decided to model a pig. Needless to say, the pig looks similar to one from minecraft.

MrPiggyWiggy

That is the outcome of the modeling session. I found it extremely difficult and fiddly as this was my first time using blender. I chose to use blender and I thought it would be more beneficial to me in the long run as it’s free for commercial use. I created Mr Piggy Wiggy (yes, I did call him that!) using two cubes. One for his head and one for his body.

I learnt many things about blender and already know a handful of keyboard shortcuts. The thing I struggled with the most was texturing. It was simple enough to highlight every and put and UV-Unwrap, but then trying to re-load the texture into blender and display it on the model was a challenge. After watching a tutorial, I finally realised you need to apply the texture to a material then set that material to the model.

Once I imported Mr. Piggy Wiggy into unity, I applied a toon shader which made him look excellent (at least compared to the original). It made me appreciate shaders even further seeing how much of a change the shader made to it.

MrPiggyWiggyToon

Overall, I was extremely happy with the outcome for my first model and look forward to doing more. I will experiment with making other animals to populate the world then expand out to things that won’t just be cubes.